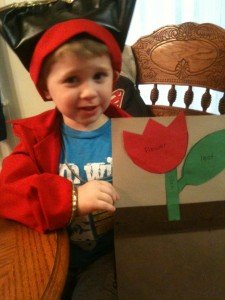
 Here’s a great spring craft to help little ones begin to understand a plant. Be sure to follow up by planting something real to further the lesson. :)
And yes, we are still wearing our pirate costume most of our waking hours. :D
Preschool Project of the Week: Parts of a Plant
Preschool skills: fine motor, basic science
Supplies:
- White, Dark Brown, Light Brown, Green and Red (or whatever color you want for the flower) construction paper
- Pencil, scissors and glue
 This really is a simple craft. And the pieces aren’t hard to freehand draw and cut out. I did this ahead of time. And labeled them “flower”, “leaf”, “stem” and “roots”. These are the parts you’re going to teach them.
Also, cut the dark brown piece of paper in half. Glue half to the white paper. This is the “dirt”. :)
Glue the “roots” to this piece of paper. Then attach the stem to the roots. Leaf to stem and top it off with a flower.
Talk about each part as you glue it. What it is, what it’s for:
roots – are the plants “feet” and hold it up. always underground and grow down from the seed. “drinks” the water from the ground for the flower.
 stem – grows up from the seed as the roots grow down. holds the leaves and flowers.
leaf – collects the sun to help the flower grow.
flower – the end result, from seed all the way to flower.
Lastly, take the other half of the dark brown paper and trim about and inch off. Run a line of glue across the top edge. Line the bottom edge up with the bottom edge of the project and glue the flap down. (It will look like the top picture)
After it dries, you will be able to lift the “dirt” up and see the roots underground. (like picture to the left.)
This blog is very kid friendly! See more things for kids:
Activities . Crafts . Frugal Fun . Homeschooling . Preschool . Recipes


Follow Me!