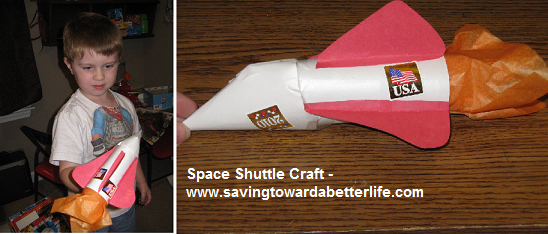
 Frugal Kid’s Craft – Space Shuttle
Bug loves anything that goes – drives, flies, sails, rolls – and he wanted a “rocket ship”. We had made these space shuttles in VBS this year so rounded up the pieces and tried to remember how we did it. The nose cone is tricky. lol.
You’ll need:
- empty toilet paper tube
- tape
- construction paper (we used white and red)
- orange tissue paper
- scissors
- stickers (optional)
- pattern
 I made a pattern for all the pieces. Don’t laugh, it’s hand drawn. ;) You can download it here.
Cut out all the pieces. The three smaller pieces – you need to fold the bottom edge up, these will be your tabs to tape down. The rectangle piece covers the toilet paper roll. The funny shaped piece has to be rolled into the nose cone for the shuttle. With the longest side on the bottom, roll the right side inward to make a cone, then roll the left side around and tape down. You will have to adjust it to fit your toilet paper roll.
 If you’ll notice, the top side is a little flat. On the top side, push down and pinch and tape to get the flat part. Put the roll into the nose cone and tape all the way around.
Using the tabs, tape the wings to the sides and the fin to the top. And a space shuttle needs propulsion, so stuff some orange tissue paper into the back of the roll.
I had a few flag stickers, so we decorated our space shuttle with it.
3…2…1….Blastoff!
This blog is very kid friendly! See more things for kids:
Activities . Crafts . Frugal Fun . Homeschooling . Preschool . Recipes


Follow Me!