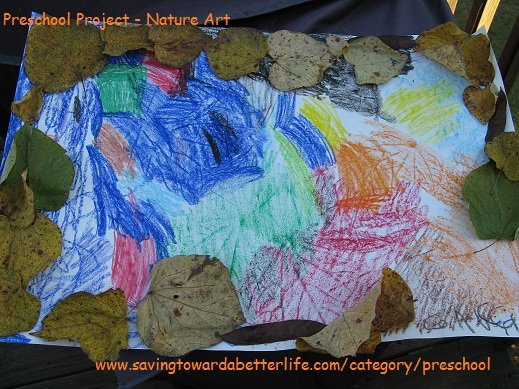
 This is the perfect time of the year to explore nature! I take my preschool class on a nature walk this time every year and we collect leaves and other cool nature things. And Bug loves finding leaves in the back yard. He picked a lot one day and I decided to show him how to do leaf rubbings! (I LOVED those when I was a kid!) Then we “framed” our picture with the leaves that we used to make it!
Step 1: Take a Nature Walk to find leaves. Try to find whole leaves that are flat and aren’t brittle yet.
Step 2: Lay the leaves out flat on the table. Lay a large sheet of paper over them (this is a piece of 11×13 construction paper – copy paper, butcher paper and tracing paper work well too. Cardstock doesn’t do very well.) For smaller children, it works better if you tape the edges of the paper to the table to keep the paper from sliding around and messing up the leaf prints.
Step 3: Color over the paper with crayons (large or jumbo size crayons work well) using broad strokes and gentle pressure. Press too hard and you won’t be able to see the impressions. Some people peel the paper off the crayon and color with the flat side – that works but is sometimes too difficult for smaller hands.
Step 4: If you want to create the framed art we did above then outline your paper with glue and glue your leaves all around it.
Ta-Da! Fall inspired leaf art!
Talk about what colors the leaves change to when the season changes to fall. Use only those colors on your picture.
Find a fall book to read. One of my favorites is The Acorn and the Oak Tree. Use it to discuss how the seasons change.
This blog is very kid friendly! See more things for kids:
Activities . Crafts . Frugal Fun . Homeschooling . Preschool . Recipes


Follow Me!